Blog
How to Preserve Flowers in Resin: A Comprehensive Guide
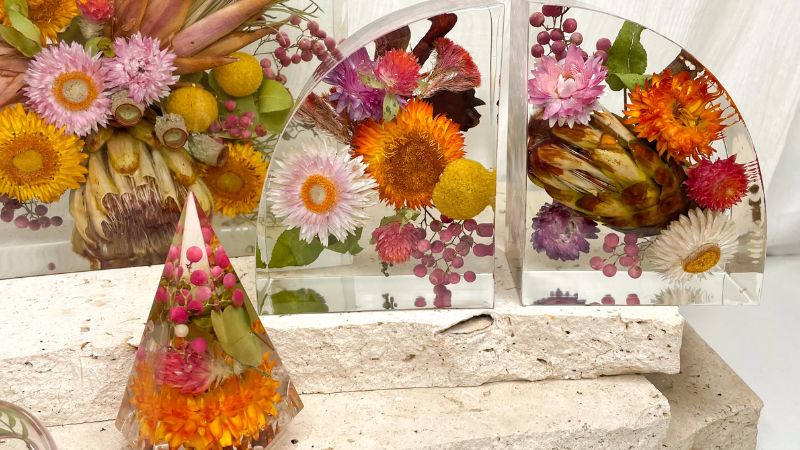
Preserving flowers in resin is a beautiful way to capture memories, create stunning art pieces, and even make unique jewelry. Whether you’re looking to preserve wedding flowers, a gift bouquet, or simply enjoy the natural beauty of blooms, resin preservation can turn delicate petals into lasting keepsakes. In this guide, haloptopis.xyz will walk you through the step-by-step process of how to preserve flowers in resin, from preparation to finished product.
Why Preserve Flowers in Resin?
Flowers hold significant sentimental and aesthetic value. However, they are delicate and prone to decay. Preserving them in resin:
- Enhances longevity: Keeps the natural beauty intact for years.
- Creates personalized keepsakes: Ideal for gifts, jewelry, or decorative items.
- Maintains vibrant colors: Properly preserved flowers retain their charm and vibrancy.
Materials Needed
To get started, gather the following materials:
- Fresh or dried flowers
- Epoxy resin and hardener
- Mixing cups and sticks
- Silicone molds (various shapes, depending on your project)
- Gloves and safety gear
- Tweezers
- Sandpaper
- Sealant spray (optional, for fresh flowers)
- Torch or heat gun
How to Preserve Flowers in Resin
Step 1: Preparing the Flowers
1.1 Drying the Flowers
Drying your flowers is essential to prevent moisture from disrupting the resin. There are several methods to dry flowers:
- Air drying: Tie flowers into small bundles and hang them upside down in a well-ventilated area for 1-2 weeks.
- Silica gel: Bury flowers in silica gel for quicker drying while retaining their shape and color.
- Microwave method: Place flowers in silica gel and heat in the microwave for 1-2 minutes.
1.2 Sealing Fresh Flowers
If you prefer using fresh flowers, seal them first to avoid discoloration or air bubbles. Use a clear acrylic spray or floral sealant and let it dry completely.
Step 2: Choosing the Right Resin
Epoxy resin is the most commonly used for flower preservation. It consists of two components—resin and hardener—which, when mixed, form a clear, durable surface. Select a high-quality resin that offers UV protection to prevent yellowing over time.
Step 3: Setting Up Your Workspace
- Work in a well-ventilated area to avoid inhaling fumes.
- Cover your workspace with disposable materials like parchment paper or plastic sheeting.
- Wear gloves and protective gear to prevent skin contact with resin.
Step 4: Mixing the Resin
- Read instructions carefully: Resin and hardener ratios vary by brand.
- Combine the resin and hardener in the specified ratio.
- Stir slowly for 2-3 minutes until thoroughly mixed. Avoid stirring too fast to reduce air bubbles.
Step 5: Embedding Flowers in Resin
5.1 Pouring the First Layer
- Pour a thin layer of resin into your mold.
- Use a torch or heat gun to remove any air bubbles.
- Allow the resin to partially cure for 10-15 minutes.
5.2 Placing the Flowers
- Gently place dried or sealed flowers into the resin layer using tweezers.
- Arrange the flowers as desired, ensuring they are fully submerged.
- Use a toothpick to adjust positioning and remove trapped air.
5.3 Adding Additional Resin Layers
- Pour resin over the flowers to encase them completely.
- Repeat the bubble removal process with a torch or heat gun.
- Allow the resin to cure fully, usually 24-48 hours, depending on the product.
Step 6: Finishing Touches
- Demold the piece: Carefully remove the resin from the silicone mold once cured.
- Sand edges: Smooth rough edges using fine-grit sandpaper.
- Polish or coat: Apply a resin polish or additional resin layer for a glossy finish.
Tips for Success
- Avoid moisture: Ensure flowers are completely dry to prevent cloudiness or bubbles.
- Work in stages: Pour resin in layers to achieve a clear and even finish.
- Experiment with molds: Explore different shapes and sizes for various projects.
- Test first: Practice with small batches if you’re new to resin art.
Creative Ideas for Resin Flower Projects
- Jewelry: Create pendants, earrings, or bracelets.
- Paperweights: Encapsulate flowers in large molds for desk decor.
- Coasters: Combine blooms with functional art.
- Keychains: Make personalized keepsakes.
- Home decor: Preserve larger arrangements for wall art or centerpieces.
Safety Precautions
- Work in a ventilated space to avoid inhaling fumes.
- Wear gloves and avoid skin contact with resin.
- Keep resin out of reach of children and pets.
- Dispose of resin waste responsibly, following product guidelines.
Common Mistakes to Avoid
- Using wet flowers: Moisture can cause discoloration or imperfections.
- Overmixing: Too much stirring introduces excess bubbles.
- Skipping curing times: Allow resin to cure completely for durability.
- Neglecting UV protection: Choose resins with UV inhibitors to maintain clarity.
Frequently Asked Questions
Q: How long does resin take to cure?
A: Most resins cure within 24-48 hours, but full hardness may take up to a week.
Q: Can I use fresh flowers without drying?
A: Fresh flowers should be sealed first to prevent moisture-related issues.
Q: How do I remove bubbles from resin?
A: Use a torch or heat gun to pop surface bubbles after pouring.
Q: Is resin safe to use?
A: Yes, when used properly. Always follow safety instructions on the product label.
Conclusion
Preserving flowers in resin is a rewarding craft that transforms delicate blooms into timeless treasures. By following this guide and practicing patience, you can create stunning pieces that capture the beauty of nature and the memories tied to your favorite flowers. Whether you’re making art, jewelry, or keepsakes, the possibilities are endless.

